| Return to Training page | Print |
| NetBank Business: Adding a beneficiary |
| |
| This function allows you to create your own beneficiaries on your profile. This menu option will be available only if your access rights allow you to add a new beneficiary. You will be able to add beneficiary limits to a particular beneficiary, only if you have specified it on your application that you would require this functionality. |
Accessing the Add Beneficiaries screen |
| 1 |
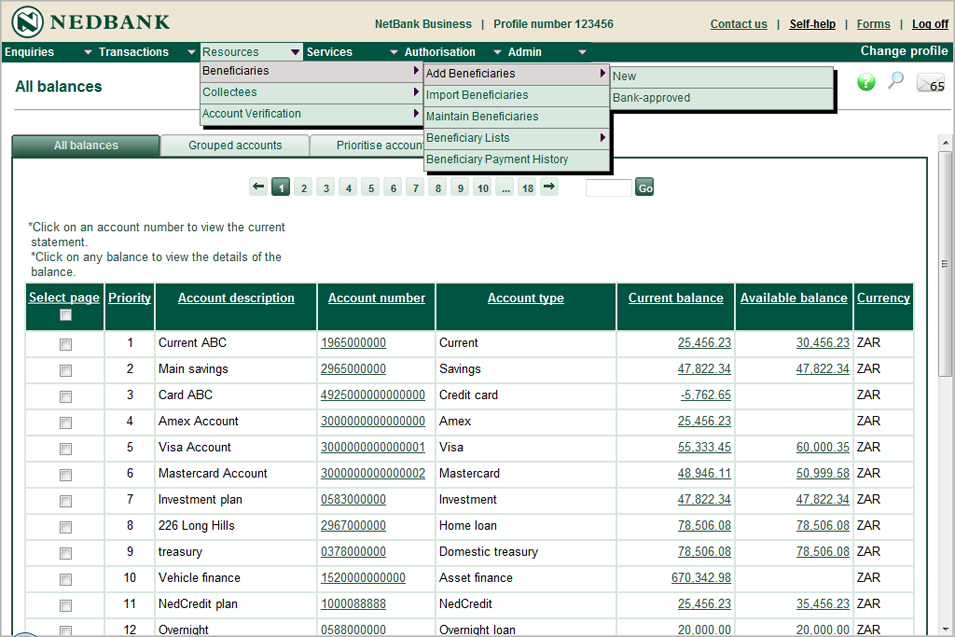
Follow this path through the main menu to add a beneficiary:
Resources > Beneficiaries > Add Beneficiaries > New
|
|
|
|
The Add new beneficiaries screen |
| 2 |
The Add new beneficiaries screen is displayed.
|
|
You can add any beneficiary who:
- has an account at another South African bank;
- has a Nedbank or Old Mutual Bank savings and current account;
- has a Nedbank or Old Mutual Bank investment account;
- has a Nedbank or Old Mutual Bank home loan account; or
- has a credit card account.
|
| 3 |
Select the relevant tab to add a new or bank-approved beneficiary.
|
| 4 |
The number of fields you need to complete to add a beneficiary will vary according to the Account type selected.
|
|
|
|
| 5 |
In this example, branch details need to be entered because the beneficiary's account is with another bank.
|
| 6 |
If you require the beneficiary to have limits, you can enter those limits by selecting Daily, Monthly and/or Maximum in the checkbox. These limits will be applicable to any user who makes a payment to this beneficiary. You must select at least one type of payment limit. The system will not allow you to proceed otherwise.
|
|
When a particular limit type is selected, an Amount field will be displayed next to the selected limit type, where you can capture the relevant values.
|
|
Note: If you do not want to capture a specific value the default value of 99999999999 must be visible in the field.
|
|
|
|
| 7 |
Enter the beneficiary's notification details here. You can also specify which notification option should be the default option for this beneficiary. Capture the telephone number, fax number or email address to which notification should be sent. When you pay this beneficiary the default notification option will automatically be used.
|
| 8 |
Select one to be the default by clicking in the relevant radio button. These details are optional. If your beneficiary is a bank-approved beneficiary, you will only be able to capture email and fax notification details.
|
| 9 |
The My statement description (DR) is the reference that forms part of the payment description on your statement.
|
|
|
|
| 10 |
The Beneficiary statement description (CR) is the reference that forms part of the payment description on the beneficiary's statement. If the beneficiary is a bank-approved beneficiary, it may be necessary to capture the beneficiary statement description in accordance with certain predefined criteria.
|
| 11 |
Use the scrollbar to view the rest of the page.
|
|
|
|
| 12 |
You are required to complete all the input fields on the screen. Once you have completed this, click on the Add beneficiary to list below button.
|
|
|
|
| 13 |
The system will add the new beneficiary to the List of beneficiaries as shown here.
|
| 14 |
You can delete a selected beneficiary's information only before submitting the beneficiaries, but you can print or export the beneficiaries at any stage of this transaction.
|
| 15 |
Once all the beneficiaries have been captured, they can be submitted by selecting the ones you wish to submit and clicking on the Submit beneficiaries button.
|
|
|
|
The Beneficiary add warnings screen |
| 16 |
If there are any issues with the entries you have just submitted, the system will display an error warning screen as shown below.
|
| 17 |
On the right-hand side of the screen, the Warning column will advise you of the error.
|
|
|
|
| 18 |
Click on the Continue button to proceed.
|
|
|
|
The Add new beneficiaries – confirm screen |
| 19 |
The Add new beneficiaries – confirm screen opens.
|
| 20 |
Only valid beneficiaries will be displayed in the list.
|
| 21 |
Use the scrollbar to view the rest of the screen.
|
|
|
|
| 22 |
You can print or export the list at this time.
|
| 23 |
By clicking on the Submit for authorisation button, your new beneficiaries will be submitted for authorisation. Only this button will be displayed if you are a capturer – the Authorise button will not be visible to you.
|
| 24 |
By clicking on the Authorise button, you (as authoriser) have completed your authorisation of the new beneficiaries. The screen will change to Add new beneficiaries – completed.
|
|
|
|
The Add new beneficiaries – submitted for authorisation screen |
| 25 |
If you submitted the new beneficiaries for authorisation, beneficiaries will not be active and cannot be used until they have been authorised by the authoriser.
|
| 26 |
The status of the new beneficiaries will be displayed in the Beneficiary status column.
|
|
|
|